Imagine waking up, pouring your morning coffee, and opening your WordPress website only to find a critical error screen—or worse, a blank white page. Whether it’s due to a botched plugin update, a malicious hack, or simple human error, losing your website data is a webmaster’s worst nightmare.
The most effective insurance policy against this catastrophe is knowing how to backup your WordPress database. While there are many plugins available for this task, relying on server-side tools is often more secure and reliable.
In this comprehensive guide, we will walk you through exactly how to backup your WordPress database using cPanel, the world’s most popular web hosting control panel.
Why Backing Up Your WordPress Database is Crucial
Before diving into the how, it’s important to understand the why.
A WordPress website consists of two main components:
- The Files: This includes your core WordPress files, themes, plugins, and media uploads (images, videos).
- The Database: This is the brain of your website. It stores all of your text content (blog posts, pages), user data, comments, category structures, and plugin/theme configurations.
If you lose your database, you lose your entire website’s content. By regularly creating a MySQL database backup, you ensure that even if your site is compromised, you can restore it to its exact state in a matter of minutes.
Prerequisites: What You Need Before You Start
To follow along with this tutorial, you will need:
- cPanel Access: The login URL, username, and password provided by your web hosting company (e.g., Bluehost, HostGator, SiteGround).
- Knowledge of Your Database Name: If you only have one WordPress site hosted on your account, this is easy. If you have multiple sites, you will need to know which database belongs to which site.
Pro Tip: Not sure what your database name is? Open your cPanel File Manager, locate your website’s root folder (usually
public_html), and view thewp-config.phpfile. Look for the line that saysdefine( 'DB_NAME', 'your_database_name' );.
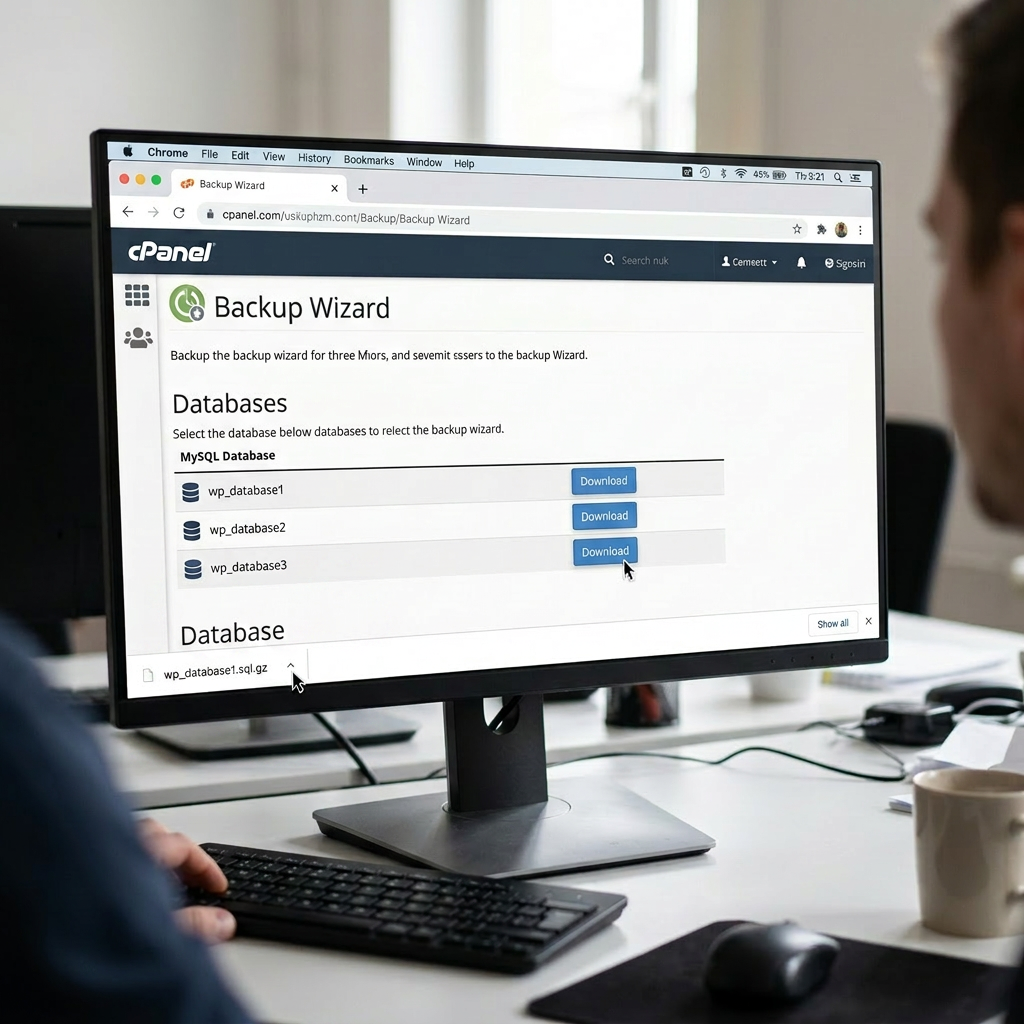
Method 1: Using the cPanel Backup Wizard (The Quick Method)
The easiest way to download a copy of your WordPress database is by using cPanel’s native Backup tool. This method is incredibly fast and perfect for beginners.
Step 1: Log in to cPanel
Navigate to your hosting provider’s portal or type yourdomain.com/cpanel into your browser. Enter your username and password.
Step 2: Locate the Backup Tool
Scroll down to the Files section of your cPanel dashboard and click on the icon labeled Backup. (Note: Do not click on “Backup Wizard” as the standard “Backup” interface is slightly faster for this specific task).
Step 3: Download the MySQL Database
- Scroll down the page until you find the section titled Download a MySQL Database Backup.
- You will see a list of all the databases associated with your hosting account.
- Click on the name of your WordPress database.
- The download will begin automatically. The file will be saved to your computer’s hard drive as a
.sql.gzfile (a compressed database file).
Store this file in a safe, memorable location on your computer, or upload it to a secure cloud storage service like Google Drive or Dropbox.
Method 2: Using phpMyAdmin (The Advanced & Thorough Method)
While Method 1 is great for quick downloads, learning how to use phpMyAdmin gives you much more control. It allows you to view your database tables, exclude certain data, and troubleshoot issues. This is the industry-standard method for database management.
Step 1: Open phpMyAdmin in cPanel
Log into your cPanel dashboard. Scroll down to the Databases section and click on the phpMyAdmin icon. This will open a new tab in your browser.
Step 2: Select Your WordPress Database
On the left-hand sidebar of the phpMyAdmin interface, you will see a list of your databases. Click on the database that corresponds to your WordPress website.
Once clicked, the main screen will populate with a list of your WordPress tables (e.g., wp_posts, wp_users, wp_options).
Step 3: Navigate to the Export Tab
Look at the top menu bar inside phpMyAdmin and click on the Export tab.
Step 4: Choose Your Export Method
You will be presented with two Export methods:
- Quick: Displays only the minimal options. This is perfect for 99% of WordPress backups. It will export your entire database exactly as it is.
- Custom: Displays all possible options. You would use this if you wanted to exclude certain tables (like a massive list of cached analytics) or change the character set.
For a standard, secure backup, select the Quick method.
Step 5: Select the Format and Export
Ensure that the Format dropdown menu is set to SQL. This is the standard format required if you ever need to restore your WordPress database.
Finally, click the Go (or Export) button at the bottom of the screen. Your browser will download a .sql file containing your entire WordPress database.
Best Practices for WordPress Database Backups
Now that you know how to backup your WordPress database using cPanel, here are a few best practices to ensure your data remains safe:
- Backup Before Updating: Always run a manual database backup before updating WordPress core, installing a new theme, or updating major plugins (like WooCommerce).
- Keep Multiple Copies: Don’t just save your
.sqlfile on your desktop. Save it to an external hard drive and a cloud storage platform. - Automate Your Backups: While knowing how to do this manually in cPanel is vital, you should also use a reliable WordPress backup plugin (like UpdraftPlus or Solid Backups) to automatically schedule daily or weekly backups.
- Practice Restoring: A backup is only good if it works. Familiarize yourself with the Import tab in phpMyAdmin so you know exactly what to do if your site ever goes down.
Final Thoughts
Taking the time to manually backup your WordPress database via cPanel gives you peace of mind. By mastering tools like the cPanel Backup feature and phpMyAdmin, you take full ownership of your website’s security and data integrity.
Don’t wait for a disaster to strike—log into your cPanel and secure your WordPress database today!